How to Test a Motherboard: Diagnosing, Testing & Fixing

Mehak Sohail | Last Updated On July 20th, 2022

The motherboard of a computer is one of the most difficult components to diagnose. This is mainly due to the number of other components that are connected to it.

There are many things that could happen if a motherboard fails. For example, you could have blue screens, there may be the inability to detect USB drives and other hardware, there could freezing, beeps, and more.

In this article, you will learn how to inspect visually, troubleshoot, and use a multimeter to test a motherboard. If you want to test your motherboard without a CPU, we also have an article for that.

What Tools Are Needed?

For a complete motherboard diagnostic testing, the following tools will be needed:

  • multimeter for checking voltages
  • A Power Switch Jumper, or a Phillips screwdriver
  • A Power Supply Unit (PSU)
  • A thermal paste
  • A good CMOS battery

Testing a New Motherboard

The first thing to do before placing a new motherboard into the case is to Power-On-Self-Test(POST) it. This will help to verify that the motherboard is functioning perfectly and that you have not gotten yourself a motherboard that is dead on arrival.

  • First, place the motherboard on a flat surface like a wooden table, or any other non-conductive surface.
  • Fix the processor and apply some thermal paste (make sure you know how long a thermal paste last and when you should replace it).
  • Attach the cooler of the CPU and then connect it to the motherboard.
  • There is a slot labeled as DIMM 1. Attach, at least, one RAM module into the slot.
  • Where necessary, connect the power connector to the motherboard, and also attach the GPU. It is important you read your GPU manual.
  • Ensure that the ATX 24-pin connector from the Power Supply Unit(PSU) is plugged into the motherboard.
  • Plug your PSU power cable into a wall outlet or a surge protector.
  • Let the monitor be connected to the GPU (if this is your primary display), or to the HDMI connection that is on the side of the motherboard.
  • If you have a power switch jumper, use it to turn on the computer. Using a screwdriver to complete the power circuit is an option if you don’t have a power switch jumper.
  • Once you’ve verified a POST successfully, you can flip the switch that’s located on the power supply back to the off position to turn off the PC.

If your PC boots to the BIOS, then everything is perfect. You can then unplug all the connected components, install the motherboard into the casing and then install every other thing as usual. You can retry the previous steps if your motherboard did not POST. You may need to contact the manufacture of the motherboard for an RMA if it still fails.

Diagnosing Motherboard Failures

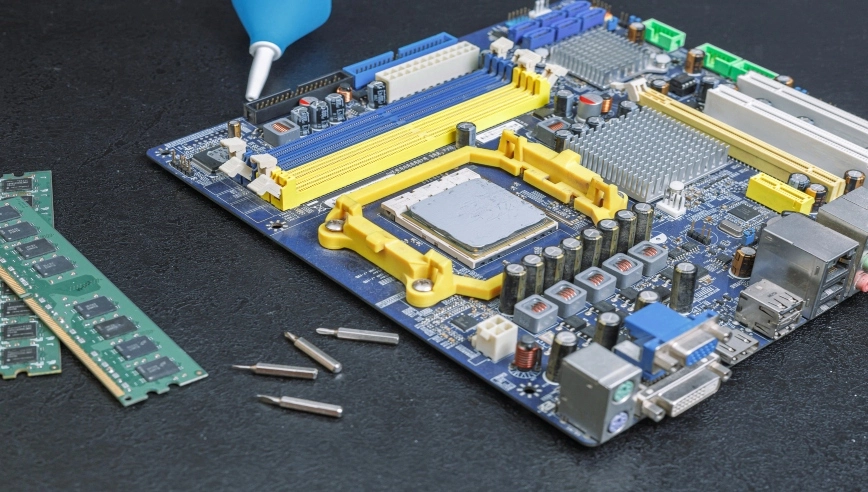
It is no surprise that one of the most difficult components to diagnose is the motherboard, considering the number of tiny parts that are embedded in it. Usually, when a motherboard fails or has issues, it causes the computer to turn off and on repeatedly. It may also refuse to boot or power on among many other things. The steps described below will help to narrow down the symptoms to look out for during diagnosis.

  • A computer that is operating normally is supposed to POST (Power-On-Self-Test) each time you turn it on. If the computer fails to complete the POST, then move to the next step.
  • Check to see that your motherboard is not shorting out on your case. Verify that all the stand-off screws (know what are motherboard standoffs here) are in the appropriate screw locations inside the case and that they have been installed correctly.
  • Try to boot your computer and listen for beep codes. There are online resources that will help you with a list of beep codes and what they mean. Basically, the beep codes will help to identify what the issue is or what component is faulty.
  • The system could also be overheating. You may need to open the case to make sure that there is no dust covering the motherboard, the fans, and other components. If this is the case, get some compressed air at your local hardware store to clean it up.
  • You should also check for updates through your BIOS. If there are updates, download and install them. If not, reset or restore your BIOS to reverse all settings to default and restart the PC.
  • If your computer keeps restarting and you cannot seem to access the BIOS, then you may need to replace the CMOS Battery. If the computer continues into BIOS after you have replaced the battery, then there should be no issues with the motherboard anymore. Otherwise, continue the diagnosis.
  • As a last resort, detach all components from the motherboard except the CPU, the RAM, and the CPU Cooling Fan. If the motherboard boots and POSTs, you can start to attach each component one at a time until the faulty component is found.

Testing a Motherboard with a Multimeter

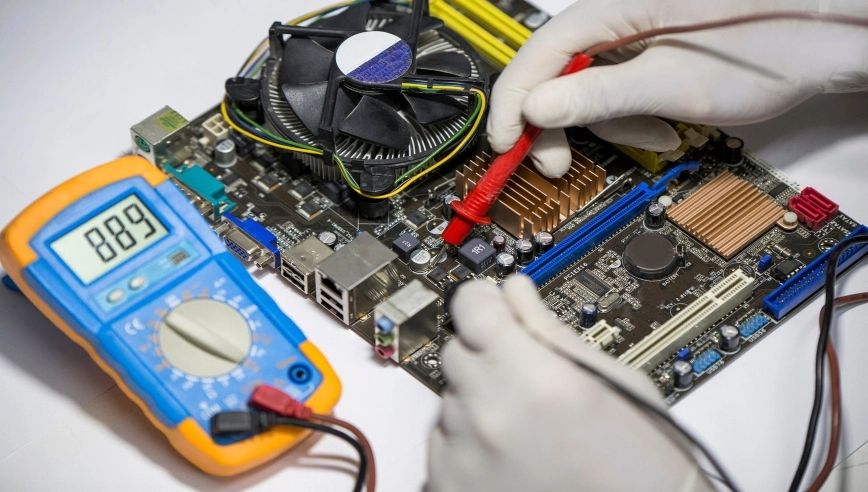
There are times that your motherboard cannot be diagnosed with the steps that have been listed above. When this happens, using a multimeter could be your best option. You can always get a multimeter at a local hardware store or on an online store like Amazon.

With a multimeter, it becomes easy to detect issues with the motherboard. If you have never worked a multimeter before, you have nothing to worry about. This section will teach you how to use it to test your motherboard for the failure of any component.

Checking the AC Voltage

One of the most common issues that happen when there is a surge in electricity is a short circuit, and that should be the first thing to look out for with the multimeter. The following steps will help you to verify the AC voltage of your motherboard.

  • Make sure that your computer is turned off, and all cables are unplugged.
  • Wait for some minutes for everything to cool off and for there to be no charge on it.
  • Set your multimeter to the lowest setting; 200ohms resistance.
  • Touch both leads together to bring the multimeter to 0. Also, touch the chassis to be sure that you still get a 0.
  • Remove the ATX power connector that is located on the motherboard of your computer.
  • While using the black lead to touch the chassis, use the red lead to touch the ground pin of the power connector. You are expected to still have a 0 reading.
  • With the black lead still on the chassis, use the read lead to check all wires that are colored. Make sure that the voltage readings are according to the pinout below. A voltage slightly higher than this, then it’s ok. If the voltage is lower, then there is a problem.

Pins 1,2,12, 13 should have +3.3V

Pins 4,6,9,21,22,23 should read 5V.

pin 14 should read -12V

Pin 10 and 11 should read +12

Checking DC Voltage with a Multimeter

The steps to checking DC voltages are slightly different than AC voltages. Follow the steps below.

  • Connect a 24-pin ATX cable to the motherboard and then plug the Power Supply Unit(PSU) into a wall outlet.
  • Reset your multimeter to 20V DC.
  • Probe the connector on the back with the black leads, touching the 17, 18, and 19 pins.
  • Probe pin 9 with the read lead, and then pin 16. It is expected to read 5V for pin 9 and should read between 3-5V for pin 16.
  • After this, you can turn on the PC. If the reading drops to 0, then that’s awesome. Otherwise, the motherboard will have to be replaced.
  • You can also check pin 8 again with the red lead. The reading should be a bit over 2.5V. Press the reset button of the computer and check if the readings drop down to 0, and then back up. If this does not happen, then it further shows that the motherboard will need to be replaced.

It is not advised that you try to repair the motherboard on your own if you find that the motherboard has failed. This is because even after a successful repair, everything in your computer could be destroyed by improper voltage regulation. Getting an experienced electronic technician to repair or replace your motherboard is always a better option than attempting to fix it yourself.

How to Test RAM Slots On Motherboard

  • With the black lead, carefully probe the back of the connector while the computer is turned off. It is important the lead is in contact with one of the negative pins 15,17, 18, or 19 with a 0 voltage.
  • Using the red lead, probe and verify pins 9 and 16. Pin 9 (purple in color) should read 5 volts while Pin 16 (green color) should read between 3-5 volts.
  • Pin 16 is expected to drop to 0 volts when you start the PC. If the voltage doesn’t drop to 0, it is an indication that there is a faulty switch. Turn off the PC.
  • Finally, if the grey-colored Pin 8 is checked with the red lead, it should read 5 volts. When you restart the computer and press the reset button, it is expected that the voltage should drop to 0 and then go back to 5 volts. If this fails to happen, it is an indication that there is a defect in the RAM slot, and the motherboard will need to be replaced. If you want to know how much it would cost to replace your motherboard, you can read here.

If you want to know when you should upgrade your motherboard, read this article.

Conclusion

This article has given an in-depth detail on how to test your motherboard and why it is important. It is advised that you exercise caution and put in safety measures in place. A small wrong step can cause a permanent damage to the motherboard. It is also important to take note that there is a safe motherboard temperature.

When you purchase through our links, we may earn an affiliate commission at no additional cost to you.