Computer Turns On and Off Repeatedly, Causes and Fixes?
Now myself (and many other gamers) are willing to overlook a laptop or PC or crashing or shutting down abruptly every once in a while. (with or without a blue screen) However, one thing that we will not tolerate is the computer turning on and off repeatedly making it almost impossible to use the computer.
Maybe the PC turns off before you can even reach the OS or maybe it shuts down/crashes whenever you boot up a game. Whatever the case may be, there are several steps that will help you troubleshoot the issue and resolve why the computer turns on and off repeatedly.
Most of the time, a PC will turn on and off repeatedly when there’s an issue with the PSU or any of the cables connected to the PC. Therefore, replacing the PC and reseating the cables might resolve the issue. Unfortunately, there can also be a different issue at play and it might require a more complicated solution.
To help you troubleshoot the issue, I will talk about some of the most common causes and fixes such as:
- Troubleshooting Beep Codes
- Managing Overheating Issues
- Testing the PSU and Other Power Issues
- Reconnecting Cables and Components
- Using a Power On Self Test Card
- Fixing An Obsolete BIOS
- Issues with the OS
These various causes might seem like a handful but luckily for us, the fixes are very simple and depending on your PC building skills, you might not need to call on a professional at all.
Troubleshooting Beep Codes

A beep code is emitted whenever the motherboard finds an error in the computer. Although an error can be displayed on the monitor, a beep code is also played out just in case the display is not working.
Deciphering these beep codes may not be that straightforward but it’s useful in a pinch, especially when there are issues with the display monitor.
Here’s a summary of what you can do to diagnose beep codes:
- Turn on/restart your PC
- Listen to the beep noises and figure out the pattern of the beeping, whether it’s long, short, on repeat or beeping for a specific amount of times.
- Note down the beeping pattern.
- Check the pattern with the BIOS troubleshooting guide.
Note that you should know the BIOS manufacturer of your motherboard as the beep codes differ among various manufacturers. You can find the manufacturer using a system information tool such as Speccy, or by taking a peek inside the BIOS chip inside the motherboard.
These beep codes will help you pinpoint exactly what the issue is. It could be the RAM, CPU, or any other essential hardware component. The advantage here is that the beep codes tell you exactly what is faulty even before you open up the PC.
On a side note: Sometimes, the PC runs into a memory error where it would switch off repeatedly, the cause of this issue is called a bootloop and can be resolved by reinstalling/replacing the RAM. So try this out if you cannot get a beep code or any other indication from the motherboard.
Managing Overheating Issues
Your PC might also be having temperature management issues and it might have trouble keeping temperatures down even before you can boot up the OS.
If you are able to make it past the login and into your OS, I recommend using system information tools such as Speccy or HWMonitor to find out how high the temps are.
There are several things that you can do to cool down an overheating PC, a few common fixes are shown below:
- Clearing out any dust or dirt that might be accumulated inside.
- Checking if the case fans and CPU cooler are working.
- Making sure that the vents are not blocked and the case computer has enough ventilation.
- Add/upgrade case fans and CPU cooler for better airflow.
- Install a water cooling kit, or upgrade to a water-cooling compatible PC case.
- Ease up on the overclocking.
If you are looking for good CPU coolers, check out our “Best CPU coolers” for:
Testing the PSU and Other Power Issues
Beep codes and overheating aside, another — more common — set of issues that plague many PC users is problems with the electrical supply, either a defective PSU or electrical faults such as short circuits.
Resolving electrical power issues such as these are easy but you need to be careful and follow proper procedures:
- Always disconnect the PC from the UPS/wall socket
- Ground yourself and wear an anti-static wrist bracelet (it’s not essential but helps if you choose to look inside other components)
- Empty the condensators/capacitors on the PC by pressing the power button several times or disconnect the PC and wait for them to discharge.
Troubleshooting the PSU
There are several steps you can take to figure out if the PSU is causing the problem, these include:
- Checking if the PSU fan is working properly. (check this before switching off the PC)
- Cleaning the PSU from dust and dirt using a can of compressed air
- Flip the toggle power switch on the PSU and check if it’s broken
- Check the power button on the front of your PC case and the corresponding signal cable that runs to the motherboard.
- If all of the above won’t fix the issue, try reseating the cables connected to the PSU.
- Finally, (if possible) try replacing the PSU and checking if the issue goes away.
If you’re on the lookout for a replacement, check out this article on the Best 650W PSU
Troubleshooting Electrical Faults
A short circuit somewhere inside your PC might also be the culprit. A short circuit can occur when there’s a loose screw in direct contact with the circuits on the motherboard. (or any other exposed circuitry) This results in a short circuit, and the PC will shut down abruptly to avoid further damage.
Here’s how you can troubleshoot for short circuits:
- First, switch off your PC and disconnect it from the UPS/wall socket.
- Remove all external cables from the PC (ethernet ports, USB ports, etc..)
- Try picking up the PC tower and rocking it gently (side-to-side)
- If you hear a rattling noise, it’s probably a loose screw causing the electrical short.
- If you didn’t hear a rattling noise, the screw might even be lodged tightly. Open up the case and look for any stray screws or any other loose parts.
- Also, while doing so, check the cables (inside and outside the PC) for any damage and exposed metal.
Reconnecting Cables and Components
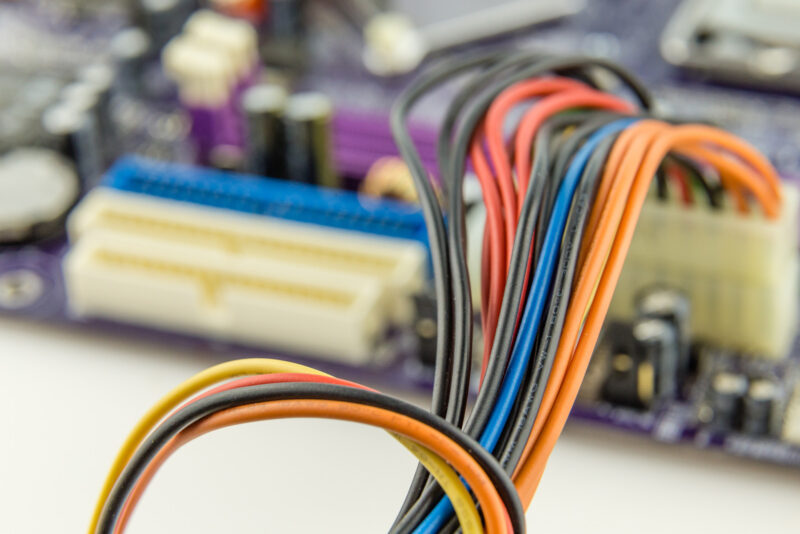
Loose connections and damaged cables can also affect the operation of the PC. Therefore, if you are replacing the PSU or taking a peek inside, I highly recommend you inspect all the cables — not just the power cables — and reconnect them.
Reseating the cables will ensure a strong connection, and you might even find any damaged or short-out data/power cables that need replacing. Check if new/existing cables are not bent or twisted in unnatural angles. Follow proper cable management and keep them out of the way of fans and other components so that they won’t affect airflow.
Using a Power On Self Test Card (POST)
A POSTcard is another alternative to diagnosing issues with the beeping noise. However, you need to buy/borrow this piece of hardware if you need to use it since most users do not keep a POSTcard.
A POSTcard is a device you would plug into the PCIe port on your motherboard. A POSTcard performs similarly to the beep codes as it helps detect any issues that the BIOS is trying to show. Therefore, one other thing that you need when using a POSTcard is a guide on the codes specific to your BIOS to reference the code given out by the POSTcard to the one in your BIOS.
Using a device such as this makes it easier to troubleshoot issues with the PC turning on and off, but unfortunately, you need to have this separate device with you and know how to use it.
Some high-end motherboards also feature a display that shows these error codes, so if you are using those high motherboards, you might not need a POSTcard at all.
Unsure of when your motherboard needs an upgrade? Check out this guide.
Fixing an Obsolete BIOS
There can be several reasons for a corrupted BIOS, whether viruses, overclocking, or a failed update. A corrupted BIOS results in a “boot loop” situation where the computer turns off even before the login screen. Fortunately, you can resolve a corrupted BIOS by resetting the CMOS.
There are three separate ways in which you can reset the CMOS:
- Resetting using the button on the PC case
- Resetting using the button on the motherboard
- Resetting by reseating the CMOS battery
The first two options are very case-specific and may not work on all PCs. However, the third method will work, and here’s how:
- First, switch off your PC
- Disconnect the cables from the UPS/wall socket
- Press the power button several times (to drain the capacitors)
- Remove the CMOS battery from the motherboard (the coin-sized battery)
- Wait for a couple of minutes and reinstall the CMOS battery
- Restart your PC
Issues with the OS
Although it’s very uncommon, incompatible drivers, viruses, and even Windows functions such as the quick startup function can affect the operation of your computer, causing it to switch on and off repeatedly.
If your PC can make it past the login screen, I recommend you try to sort these issues out after you’ve made sure that the hardware and BIOS are not to blame. You can try resetting Windows or performing a classic format. Unfortunately, you will lose your data.
Conclusion
There can be several reasons where software and hardware can be causing a computer to turn on and off repeatedly. Fortunately, diagnosing an issue such as this doesn’t require (lots of) specialized tools or the help of a professional, and anybody can troubleshoot this issue. However, users should follow proper safety precautions such as disconnecting the power cable, draining the capacitors, and using an anti-static bracelet before opening the computer.
When you purchase through our links, we may earn an affiliate commission at no additional cost to you.