Do Motherboards Have Integrated Graphics?
Do motherboards have integrated graphics or do you need a integrated graphics chip or a dedicated GPU? This article will tell you all about it.
SATA ports are located on your motherboard and are used to connect hard drives or optical disks to your motherboard.
Motherboards are typically equipped with 4 to 6 SATA ports. However, you can find as many as 13 SATA ports on higher-end motherboards. SATA ports are needed if you’re installing a hard drive or optical drive into your computer. The best way to find the answer to your question on “how many SATA ports do I have?” is by researching your unique motherboard’s specifications on Google.
Although SATA ports are important for installing drives into your computer, most average PC users only need 2 or 3 SATA ports.
However, PC users that require an immense amount of memory in their computers may wonder how to find the number of SATA ports on their motherboard.
In this in-depth guide, I’ll discuss:
Let’s jump right in.
The SATA interface was introduced in the early 2000s to replace the older PATA standard.
SATA ports are much smaller and offer quicker transfer speeds compared to PATA ports.
SATA ports have three primary devices they are used for:
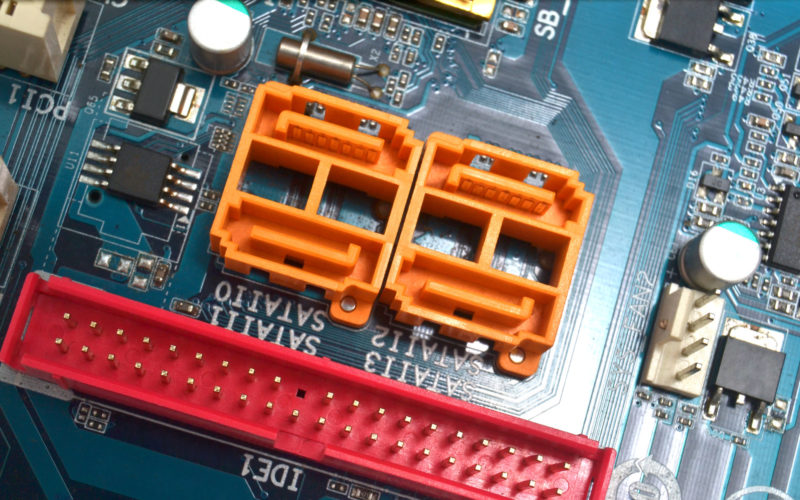
SATA connectors are found in motherboards and have an L-shaped appearance.
Furthermore, SATA ports have three generations with varying transfer rates. The current generation is SATA 3.0 and offers 6.0 GB/s.
Here are the SATA generations compared:
As you can see, each newer SATA generation offers double the max transfer speed of the previous generation.
However, PCIe interfaces offer even more speed capabilities than SATA slots.
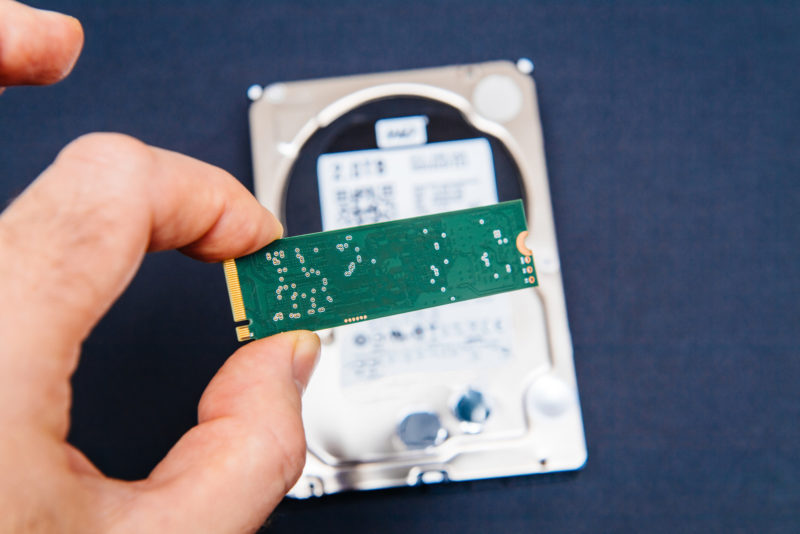
PCIe NVMe is mainly used for lightning-quick SSDs, while SATA interfaces are primarily used for standard storage.
As such, PCIe interfaces offer drastically higher speeds than SATA interfaces.
With PCIe 4.0, each PCIe lane offers 1.969 GB/s. A standard NVMe SSD utilizes an x4 PCIe 4.0 lane and has max speeds of 7.877 GB/s.
PCIe offers substantially higher transfer rates compared to a SATA 3 interface with max throughputs of 0.75 GB/s.
Finding out how many SATA ports you have will determine how many drives you can connect to your computer.
So, let’s discuss how to find the exact number. There are a few ways to do this that I’ll discuss now.
The best way to quickly find how many SATA ports you have is to look at your motherboard’s specifications. The majority of motherboards have a list of specifications you can find online.
To find out which motherboard you have, type in “System Information” in your Window’s search bar. After opening the System Information file, you’ll see your motherboard listed next to ‘BaseBoard Manufacturer’ and ‘BaseBoard Product’.
The BaseBoard Manufacturer is the company that manufactured your motherboard. The BaseBoard product is the exact model your motherboard is.
For example, my BaseBoard Manufacturer is ASRock, and my BaseBoard Product is H410M-HDV.
So, I would type into Google “ASRock H410M-HDV specs”. The first link is from ASRock’s website and shows all the details about my motherboard.
As such, I found that my motherboard has four SATA 3 ports.
Follow the steps outline above to quickly find how many SATA ports you have on your motherboard.
Another simple way of checking how many SATA ports you have is by opening up your computer case and scanning your motherboard. Assuming you already know what a SATA port looks like.
This technique is excellent because you can check how many SATA ports you have while also installing any drives you’d like.
However, it’s important to practice responsible PC handling if you choose to use this method. I highly recommend finding your motherboard’s specifications first.
First, switch your computer off and disconnect the power outlet as well.
Then, use a screwdriver to open up the side of your computer case. Depending on how your computer is set up, you’ll either have a clear view of your motherboard, or you’ll need to remove your motherboard altogether.
If you can’t directly see how many SATA ports are on your motherboard, be extremely careful while dismantling your motherboard and anything that’s attached to it.
SATA ports are seen as L-shaped sockets on your motherboard. They are extremely easy to differentiate from the other ports on your motherboard, and you shouldn’t have any issues locating them.
However, even though you can see how many SATA ports are on your motherboard, you won’t know which generation they are.
You can find the SATA port’s generation by looking for text underneath each specific port. However, if the version isn’t indicated, SATA ports are colored differently depending on which generation it uses.
Different motherboards use different coloring to denote which SATA generation the port is, so you’ll need to look up the motherboard and check online.
Another way you can find how many SATA ports you have is by using a third-party program called HWiNFO. HWiNFO is a completely free application that provides a comprehensive hardware analysis as well as real-time monitoring of your computer.
If you’re struggling to find the exact motherboard you have and don’t want to open up your computer to check manually, I highly recommend installing HWiNFO.
Once you’ve installed HWiNFO and have it opened, look for an area labeled ‘Drives’. Here, it will show you which drives are currently connected to your SATA ports and what speed each SATA port offers.
However, it may not show you the total number of available SATA ports on your motherboard if each port isn’t in use.
For this reason, you can check the exact motherboard you have using HWiNFO and then Google your motherboard’s specifications.
As always, the best way to find the number of SATA ports you have on your motherboard is by consulting the manufacturer’s website itself.
As you’re starting up your computer, you may have seen an option to press ‘Delete’ or ‘F11’ to enter the BIOS menu. BIOS stands for Basic Input/Output System and allows you to see if everything inside your computer is running correctly.
You can also disable certain hardware or features and overclock components in the BIOS menu.
However, for our purpose, we’ll be finding how many SATA ports we have by using the BIOS menu.
It’s important to know that different computers have different BIOS menus, so your SATA ports information may or may not be listed.
But, access your BIOS menu and look for a section related to ‘Drives’. If this section is available, you’ll be able to see which SATA ports are being used and how many total SATA ports are inside your computer.
However, you may not be able to find if the SATA ports are from generation one, two, or three.
For this reason, you should check your motherboard’s specifications on Google to see what version of SATA ports are on your motherboard.
If you’re still struggling to find how many SATA ports you have, you can consult an expert. This is either where you purchased your motherboard or a friend who’s great with computers.
Determining how many SATA ports you have on your motherboard will be easy for them and shouldn’t be too much of a hassle.
Furthermore, you’ll be able to get an accurate answer to how many SATA ports are available. A PC expert will also offer you guidance on how to best use your SATA ports. They also give you advice on optimizing your computer so that it runs more efficiently.
Lastly, you can consult online tech forums and post a question asking how many SATA ports are on your specific motherboard.
If you checked how many SATA ports you have and it’s not enough, there are ways you can add additional SATA ports to your motherboard.
The best method is using a PCIe SATA port expansion card that can add up to eight additional SATA ports to your motherboard. These SATA expansion cards typically take up an x1 PCIe slot on your computer.
You can also use a SATA hub port multiplier that turns a single SATA port into multiple, but I don’t recommend this method. This is because the SATA port transfer speeds will be divided by how many drives are connected.
For this reason, you can severely bottleneck your drives and their performances when using a hub port multiplier.
The best way to find out how many SATA ports are on your motherboard is by looking up your specific motherboard’s specifications on Google.
This method only takes a few minutes at most, and you can quickly move on with your day afterward.
So, access your computer’s System Information and find the manufacture and model of your motherboard.
Then, head over to Google and type in your motherboard along with “specs”. You’ll see a variety of different websites that share how many SATA ports are on your motherboard.
When you purchase through our links, we may earn an affiliate commission at no additional cost to you.