Do Motherboards Have Integrated Graphics?
Do motherboards have integrated graphics or do you need a integrated graphics chip or a dedicated GPU? This article will tell you all about it.
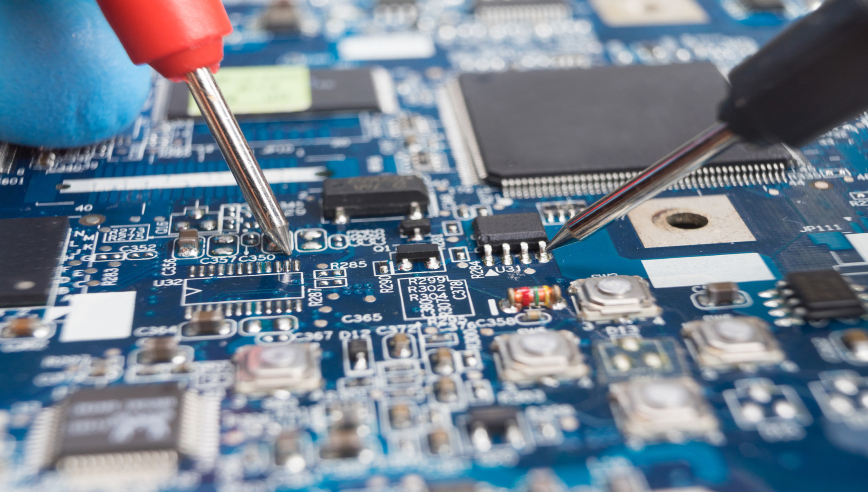
PC connection goes beyond connecting large components like the hard drive and processor or removing a CPU. Assembling your computer properly also involves a lot of smaller connections within the PC. This could be very time-consuming and while assembling the larger components of your computer is straightforward, the smaller connections are often complicated.
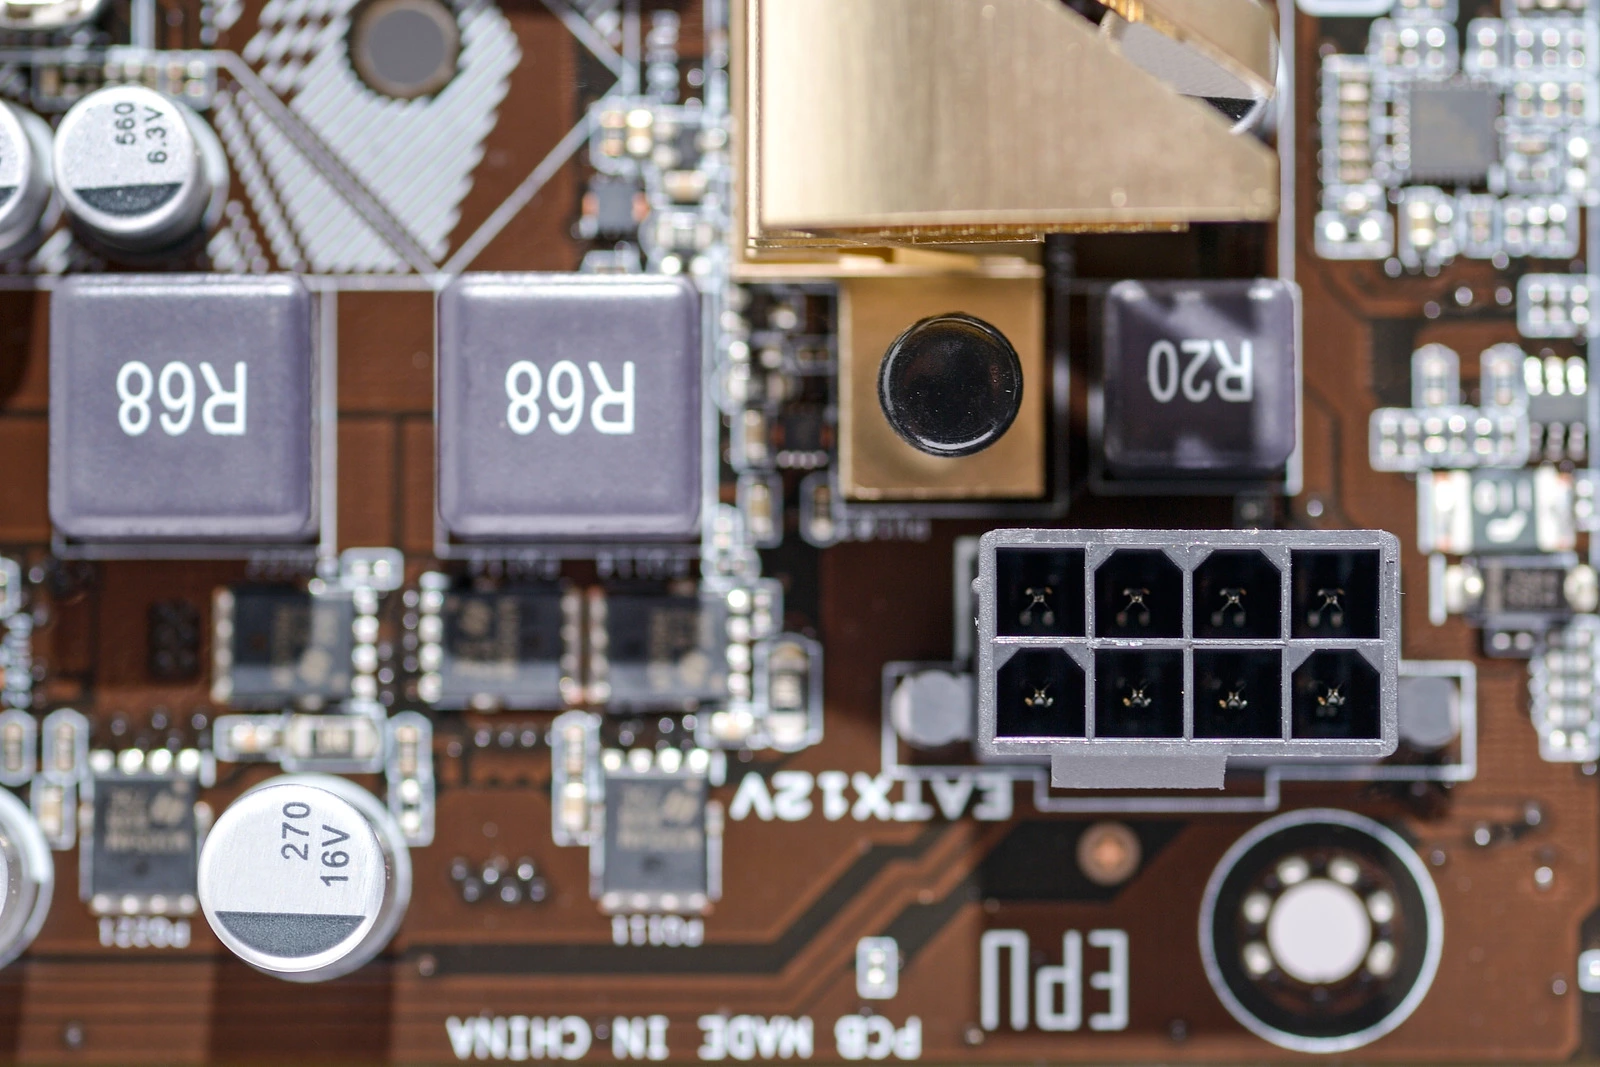
To connect your PC’s power button to your motherboard, you need to connect the power plug to the 8-pin terminal on the motherboard.
Ideally, this process should be in a user’s manual because the proper terminals may be difficult to locate. However, if you are confused without a manual to guide you, rest easy. This guide will outline how to connect your power button to the motherboard. We also have a guide here on how to test a motherboard and when to upgrade your motherboard.
In this guide, we will go over:
Every motherboard comes with two power-based connections – a 24-pin and 8-pin connection sockets called terminals. To connect your power button to your motherboard, you’ll need to locate the motherboard’s 8-pin terminal, which acts as a link between the motherboard and the main power supply. The terminal is usually located at the back end of the motherboard.
The terminal’s position could also differ slightly based on the brand of computer, although all industry-standard PC use the same type of power connectors, so they should be easy to locate anywhere on the motherboard if you know what you’re looking for.
For anyone new to computer hardware, the 8-pin and 24-pin terminal can easily be a source of confusion. While they both need to be connected for the computer to run, they serve two different functions within the unit.
Older computer models used to have 20-pin terminals. The additional four pins common in current-gen CPUs give the computer’s motherboard additional power. This terminal powers not just the motherboard but all the internal components connected to it, such as the processor and expansion cards. While building your PC, it is worth noting that a 24-pin terminal will function on an older 20-pin motherboard. In contrast, a 20-pin terminal may not work correctly on a new-gen motherboard.
Compared to the 24-pin connector, the function of the 8-pin connector is a lot narrower. The 8-pin terminal directly powers the CPU by connecting the motherboard to the power button. The 8-pin terminal can be found on the Front Panel Header of the motherboard. The computer is reliant on it being connected to start up. So, in short, connecting the power button to the motherboard involves connecting the power cord to the 8-pin socket.
The 8-pin terminal transfers current from the power button to the motherboard and is essential for the CPU. It can be found on the Front Panel Header. The FPH is a block on a motherboard that controls the power on, power reset, and LED light indicator features on your computer. The location of your Front Panel Header is always contained in your CPU manual. Still, suppose you don’t have a manual. In that case, the FPH is likely located at the bottom right corner of the motherboard. It’s usually labeled “F_Panel.”
Know how to fix bent CPU socket pins on motherboard here.
There are a few connection pins on the F_Panel, so before connection, recheck if you’re connecting to the right one. The power button jumper may not connect to most of the other pins; however, a wrong connection may negatively affect your computer. Some components may not function properly. Also, you should ensure that the power outlet is switched off before connecting to the motherboard to prevent electrocution.
The power button jumper comes with PC hardware. It is usually mixed with many other jumpers that connect to different pins on the motherboard, all serving different purposes within the CPU unit. If your computer has a reset switch, the reset jumper, in particular, looks like the power button jumper. However, it is usually labeled “RESET SW.” At the same time, “POWER SW’ is inscribed on the power button jumper, and it has 8-spaces that fit in perfectly with the 8-pin terminal. Carefully connect and ensure that the jumper is firmly attached to the pins.
Once you’re done connecting the power button to the motherboard and making any other necessary connections, close the CPU to prevent the motherboard from exposure to external factors that may damage it, such as water, dust, and heat. Once that’s done, switch on the power outlet and press the power button to test your connection.
Turning on the computer without a power button is not so difficult. But you may need to have some technical knowledge of the motherboard and the power switch’s location to get this done. Most motherboards come with stickers to indicate specific locations. It would help if you could find the pins for the power switch section on the motherboard. This section is supposed to connect the power button, reset button, power LED, and Hard Disk LED.
Powering a computer with a working button connects two pins electrically and sends the motherboard a signal to power on the computer. By relating this same process, you can also turn it on without the button. You need to find the two pins that belong to the power button from the set of pins on the motherboard’s F_Panel. Using a test pin or a metal surface like a screwdriver to touch the two pins, you can send from one pin to the other and power your computer without pressing any power button.
Installing wires on your PC is often seen as a difficult task, but it should not be. Identifying the right place to connect your power cables to your motherboard may be slightly daunting on your first try. Still, it’s straightforward once you’re familiar with your Front Panel and its configuration.
After you have finished assembling your PC, It is also important to note that there is a safe motherboard temperature.
When you purchase through our links, we may earn an affiliate commission at no additional cost to you.